
Are you new to pyrography and in need of some solid tips? Look no further… I gotchu! I started playing around with pyrography in college while taking art classes. One of the assignments for my drawing class was to draw with something that was not a pencil, pen, crayon, etc.. I honestly have no idea how pyrography popped into my head, but I’m glad it did! I absolutely LOVE wood burning but I have several things I wish I would’ve known before I started! (Whoops!)
Quality Tools
My first tool that I used was a pyrography pen. I thought it was the absolute coolest drawing utensil since sliced bread. However, as time went on, I realized that I was using one of the cheapest versions of the tool out there.
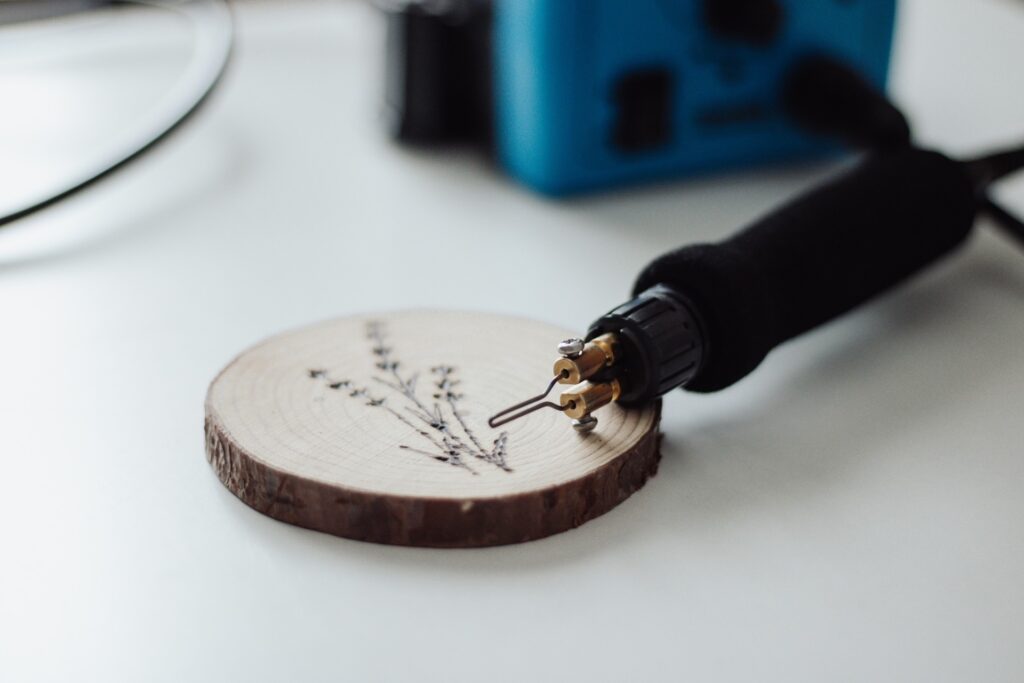
My original starter was a plug-in pen, did NOT have a temperature gauge, and had screw in solid nibs. BIG MISTAKE. Over time, the pen didn’t get as hot and the nibs started to warp and one even broke off while still screwed into the base. *Facepalm*. I ended up throwing that pen away and then proceeded to get another of the exact same pen… I know… Talia!!! Didn’t you learn your lesson?! Apparently not.
It broke again.
My third buy was the end all, be all. It was a touch pricier but well worth the money as it has lasted me SEVERAL years and is still in tip top shape! (Click here to check out which one I bought: https://amzn.to/3WgIASP). There are several aspects I love about this set. There are so many nib options and they all serve their own unique purpose as well as having a temperature gauge! There is also a pen holder that suspends the pen so it does not roll away or burn anything when put down.
This pen has gotten me through so many crazy projects and I’m sure it’d work for you too!
Sandpaper
I know. Such a strange thing to recommend but I promise it helps! I noticed that the more I would burn, the more charcoal-like build up I would have on my nibs. This, in turn, would make it harder to burn the wood and take twice as long. Every five or ten minutes, I gently brush my nibs against the sandpaper to clean them off and BAM! They make the burning easy again!
KEEP THE NIBBIES CLEAN.

Wood Matters
It sounds like a bad joke LOL! Over the several years I’ve been playing around with this tool, I noticed that the type of wood you use can actually make or break whatever piece you are working on. Some woods contain extra moisture… which has SCARED THE BEJESUS OUT OF ME. That might seem silly, but when you are burning and there is excess moisture, the wood burns twice as fast and can ruin the line or area you are working on. I find that working on a dry piece of wood allows me more control (which you wouldn’t think) and confidence that I will not burn a hole or area that is twice the size I wanted.
Take A Break
Yeah, that’s right! Give your pyrography set a break every thirty minutes to an hour. This tool puts off a lot of heat and sometimes smoke (depending on the wood). It’s best to leave it off for fifteen minutes to cool for a bit and give the machine a break. Continuing to burn for a couple hours (like I have in the past) has caused me to break a couple nibs from them becoming extremely hot and bending under pressure.
I have found that working on two projects simultaneously allows the machine to cool in between. I will draw out one piece, start burning, give the pyrography set a break, and start drawing my next piece in the meantime.
Overall, pyrography can be a fun and easy hobby if you follow the bit of advice I have laid out… but also… don’t burn yourself! I’ve been there and done that! OUCH!
With Love,
Talia